Quick Start Guide for WisNode Tracker
In order to configure the WisNode tracker, please download the Rak TrackIt App from the app store. The RAK TrackIt App acts only as a configuration tool for the trackers, no map or location data is available in the App.
- Download and install the TrackIt App
- (opens new window) on your smartphone.
- Turn on the Bluetooth on tour smartphone.
- Start the TrackIt App. Location permission may be requested, allow it.
- Agree with the Terms and Conditions and the Privacy Policy, and press the Sign in with RAK ID button.
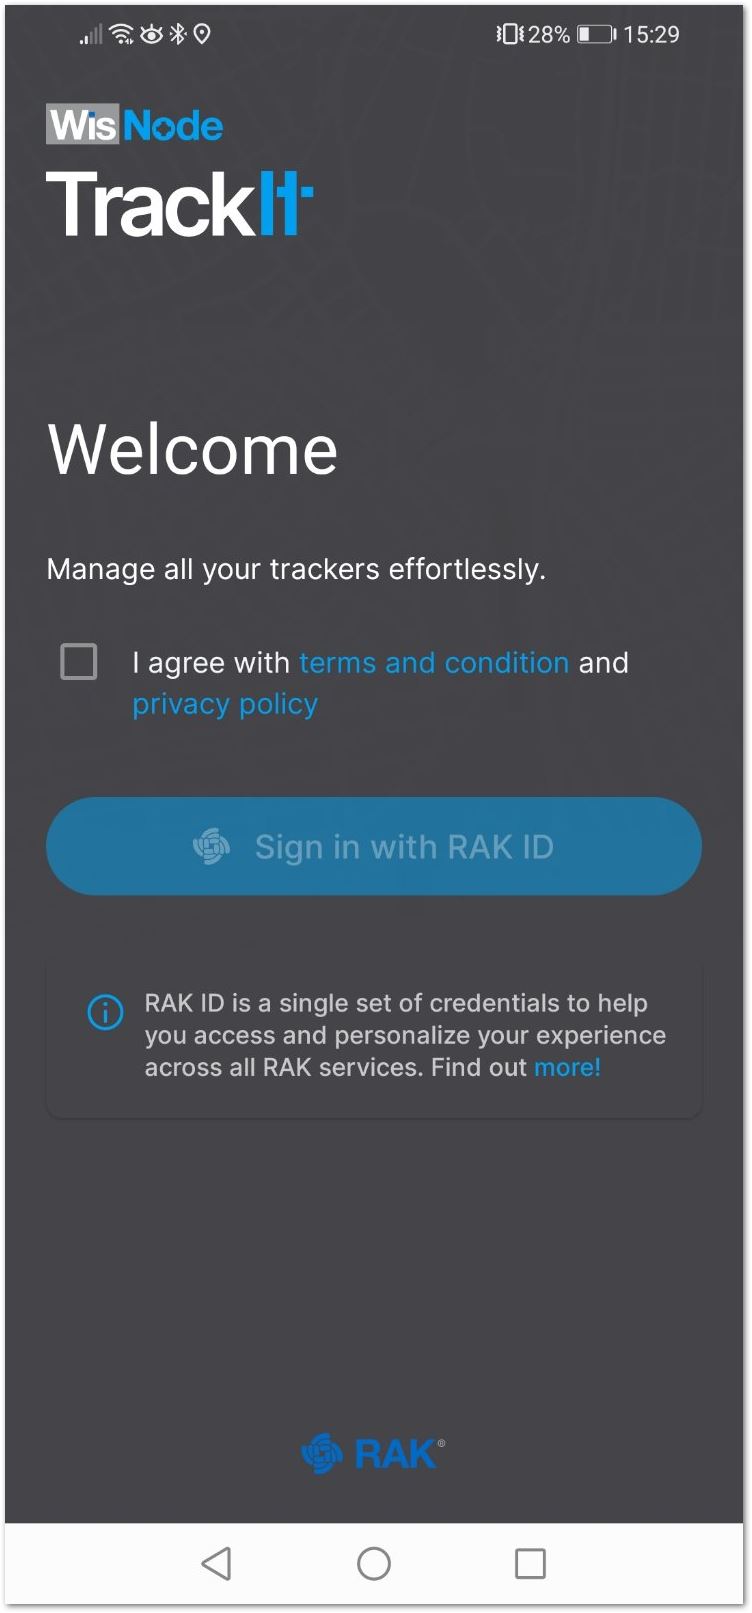
Welcome screen
- Sign in with your RAK ID or sign up for a new RAK ID if you don’t have an account. If you do not have a RAK ID, press the Create new link and fill the needed information.
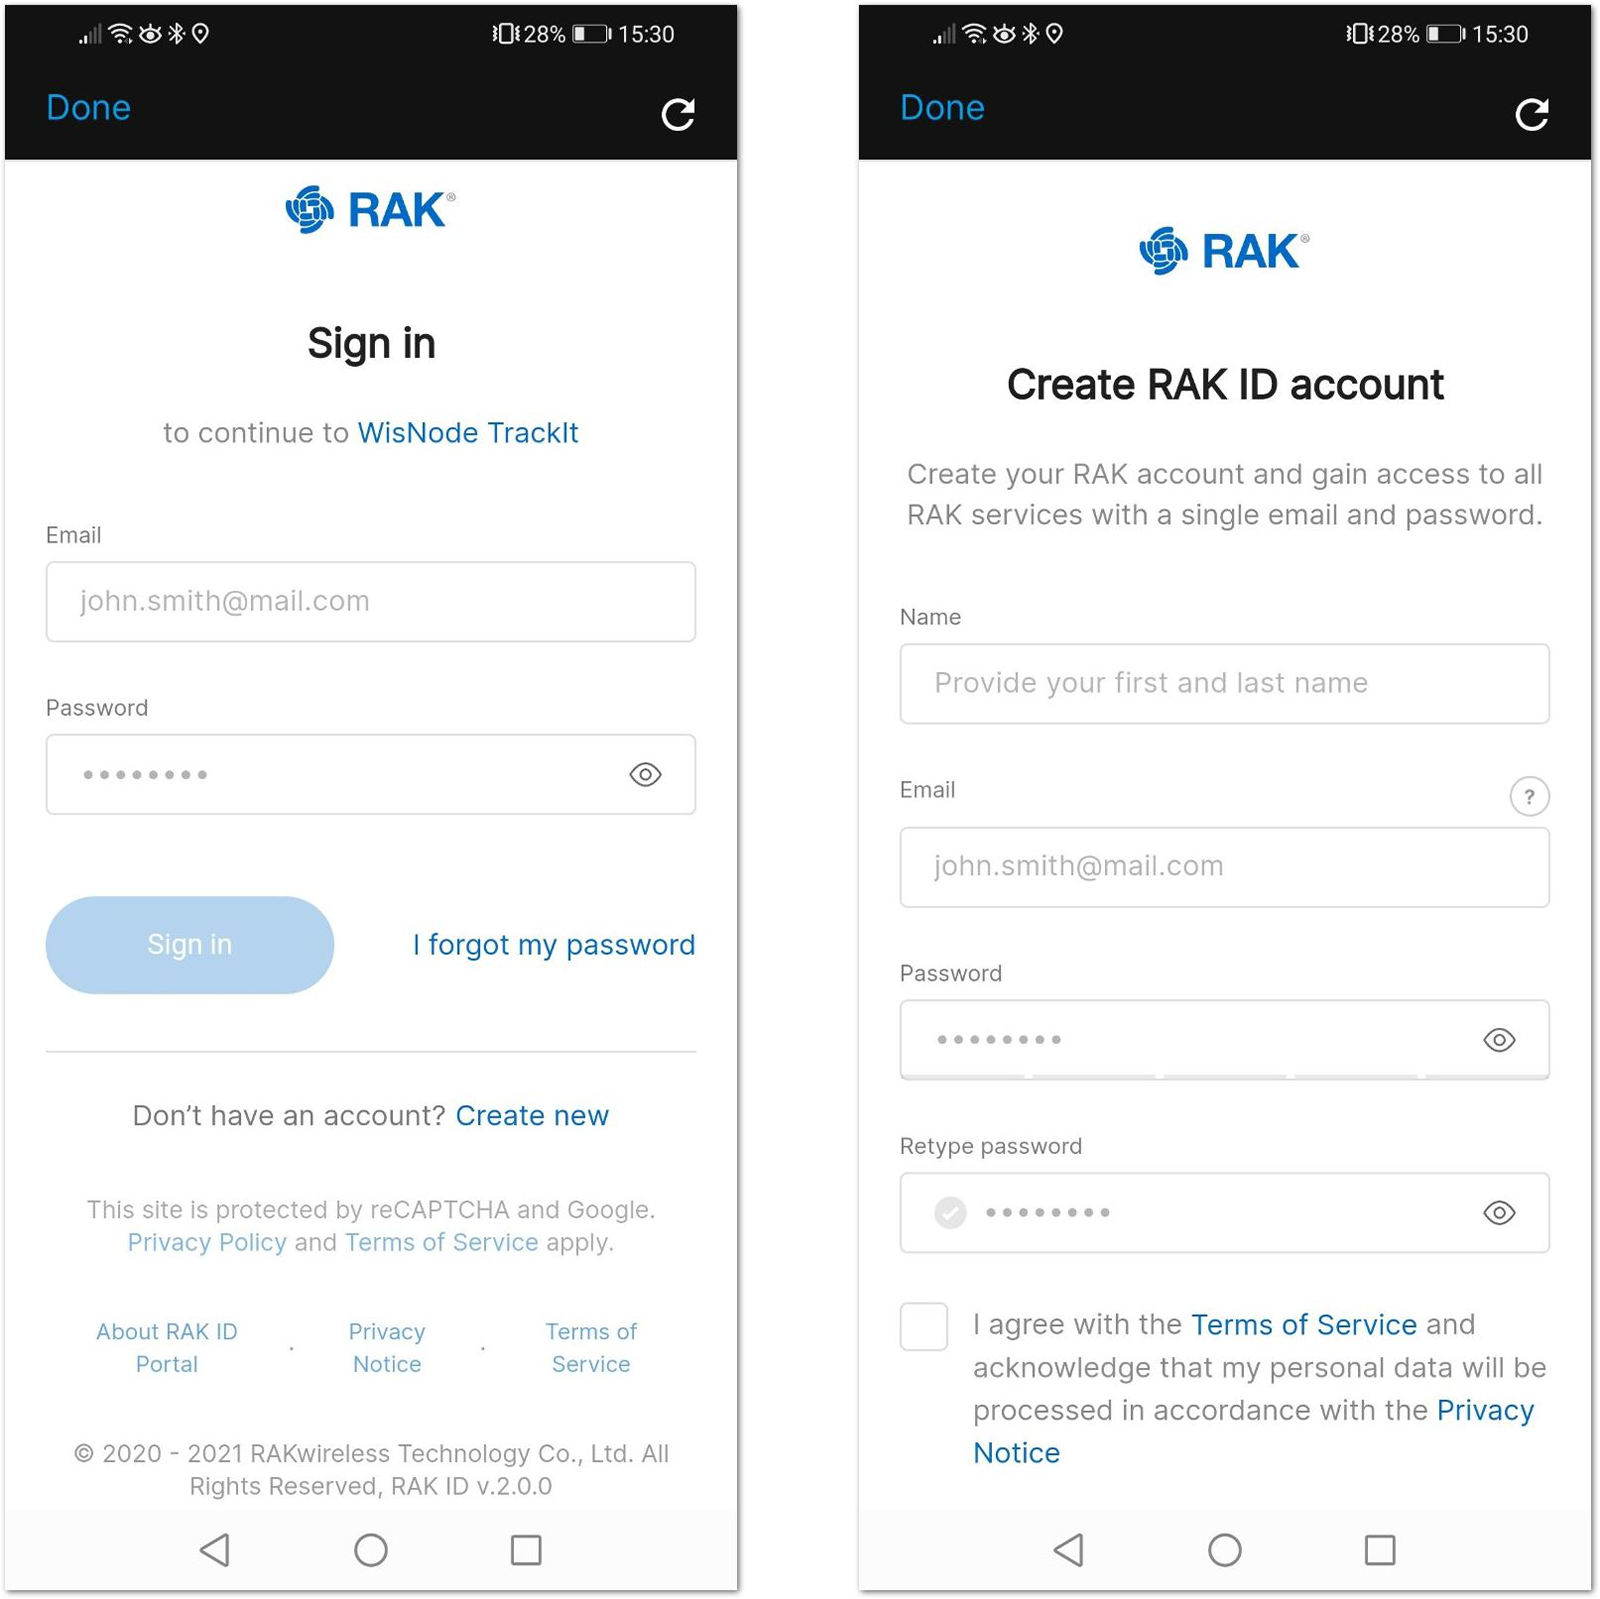
Sign in screen
- After you log in, the App will prompt you to add a tracker. To start the pairing process, press the + ADD TRACKER button.
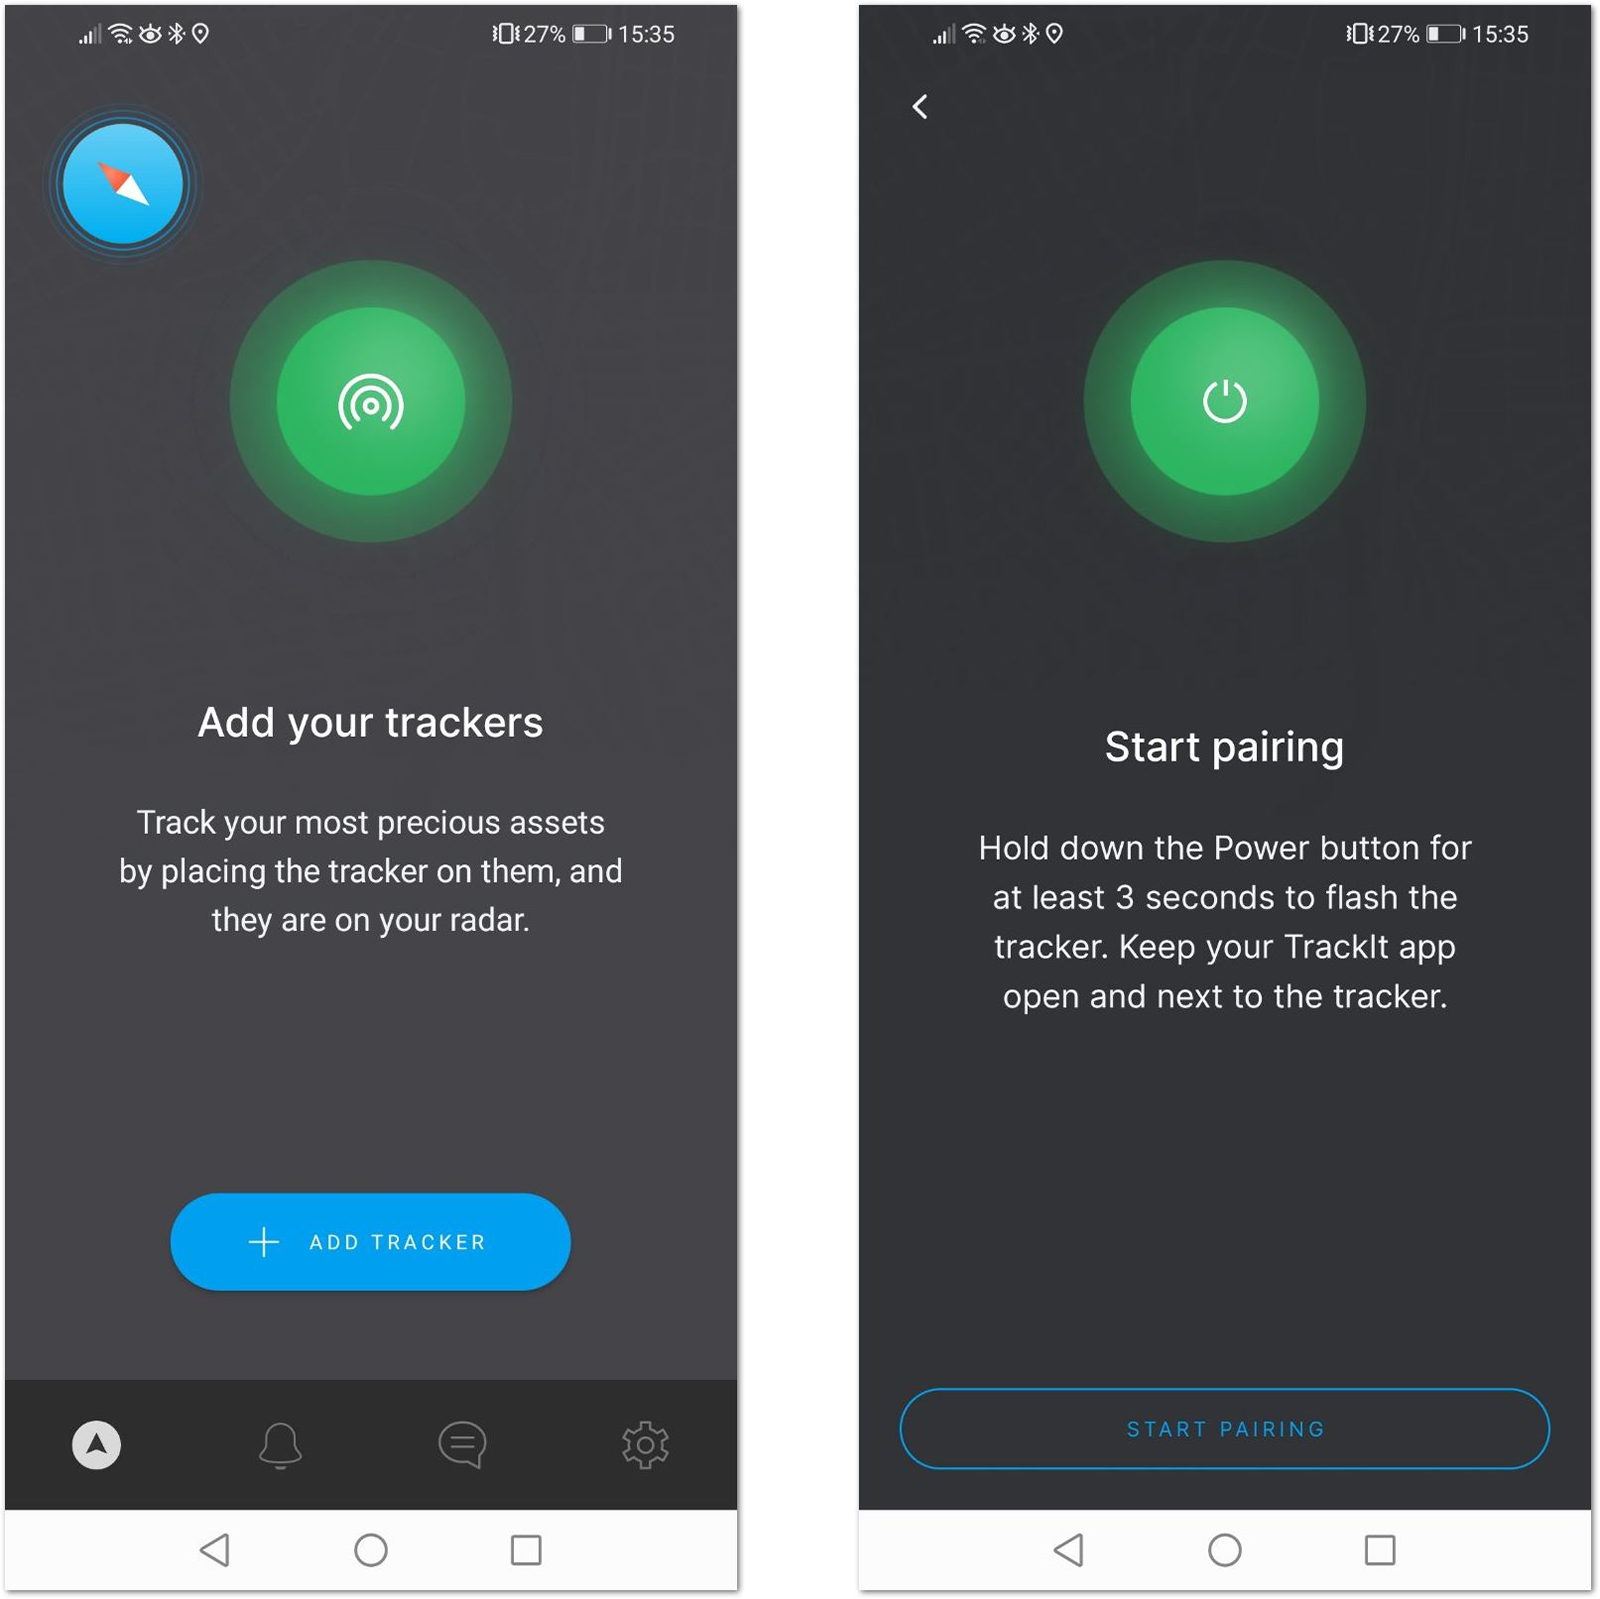
Add tracker and Start Pairing screen
- Hold the Power button of your RAK2171 for 3 seconds to turn it on. If the device was turned on previously, you may need to restart it, as the Bluetooth is available for pairing for 3 minutes.
- Press the Start Pairing in the app. An information screen will be displayed to inform you of the process.
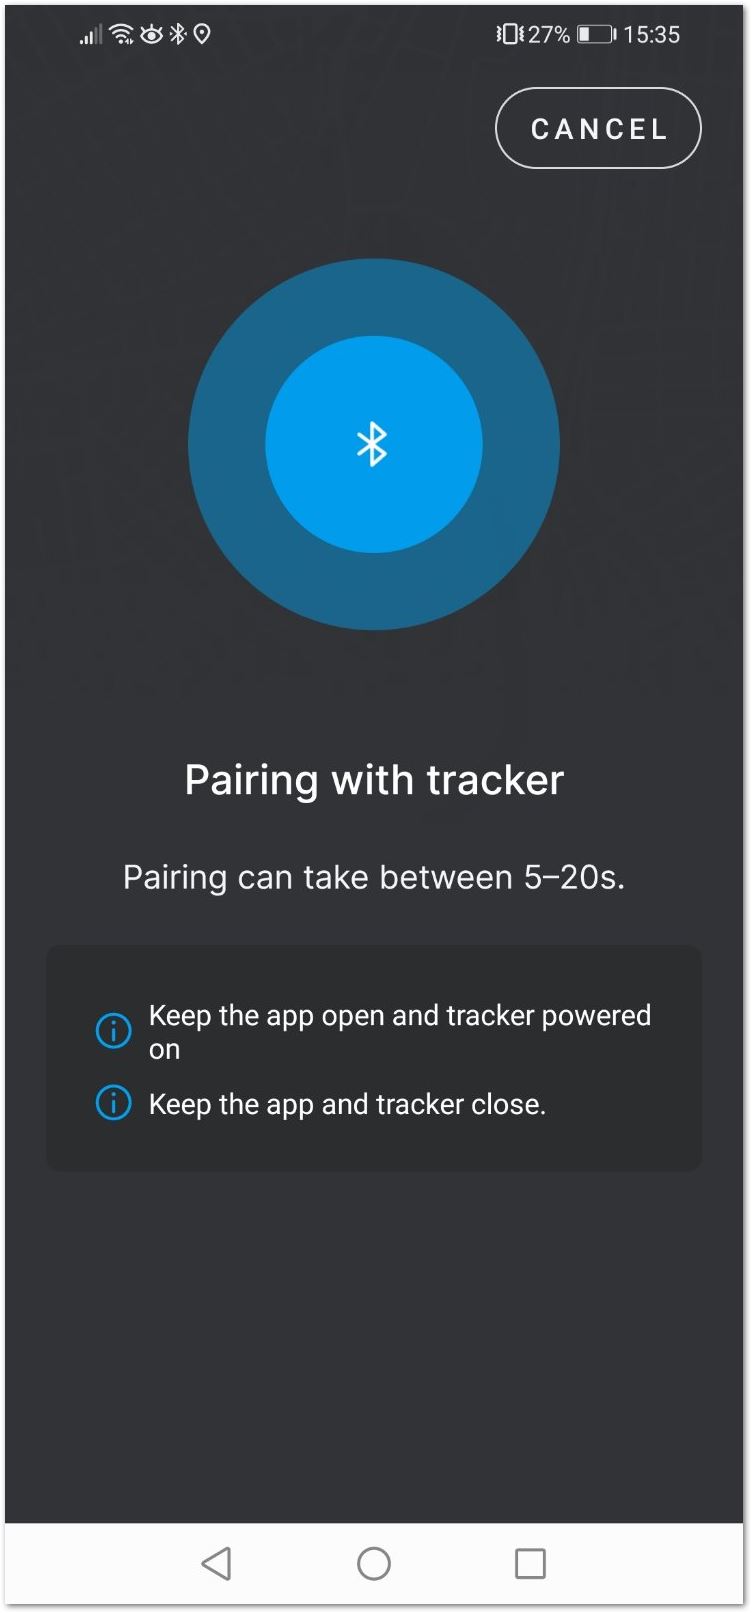
Pairing screen
If the tracker is turned off or the Bluetooth pair period has expired, you will see a Tracker not found message. Restart the tracker and try again.
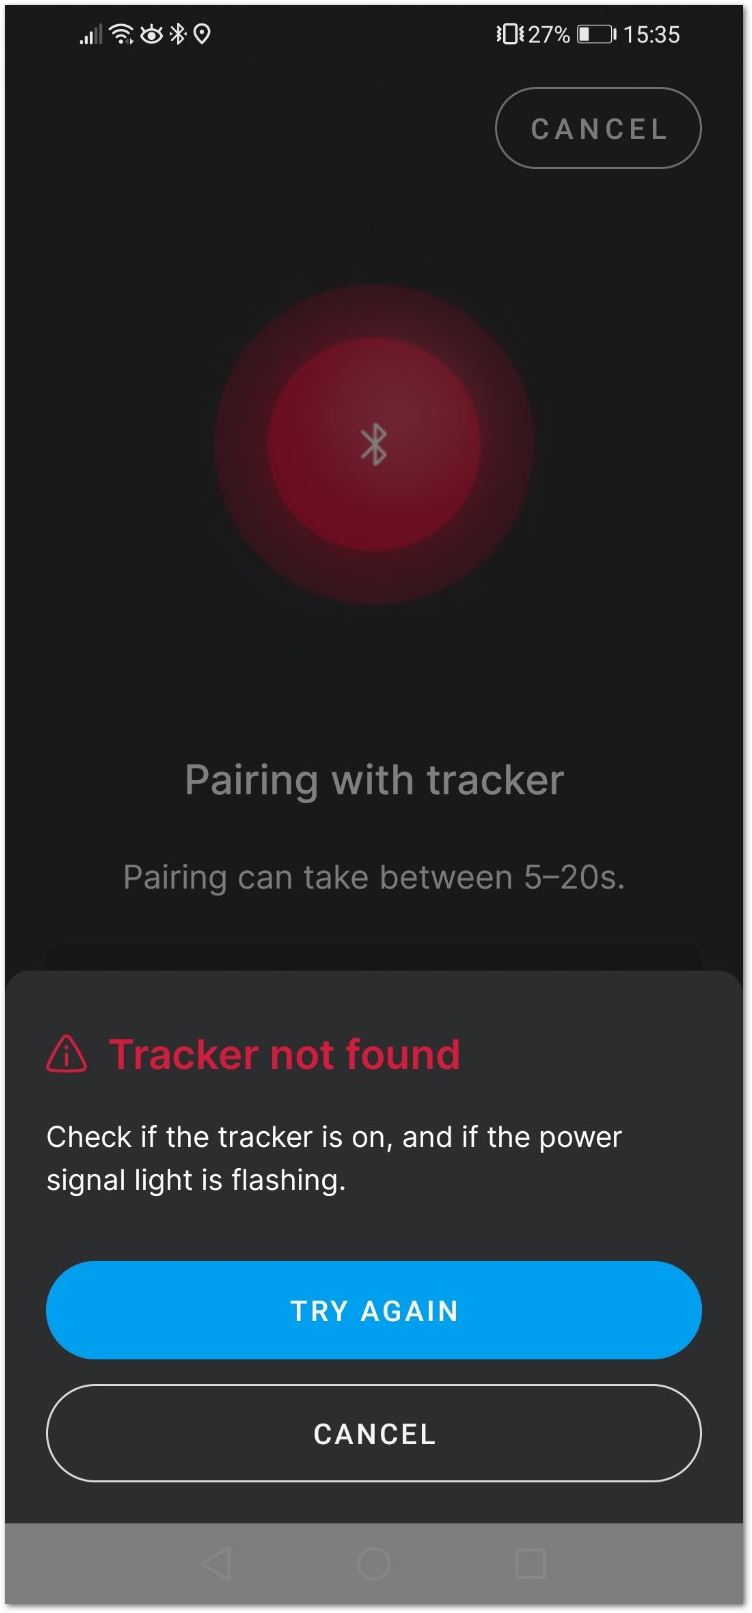
Pairing screen
- After successful pairing, you will see a configuration screen, where you will be able to change the tracker’s default name and the working mode. Press the LoRaWAN button to change the mode from LoRa P2P to LoRaWAN.
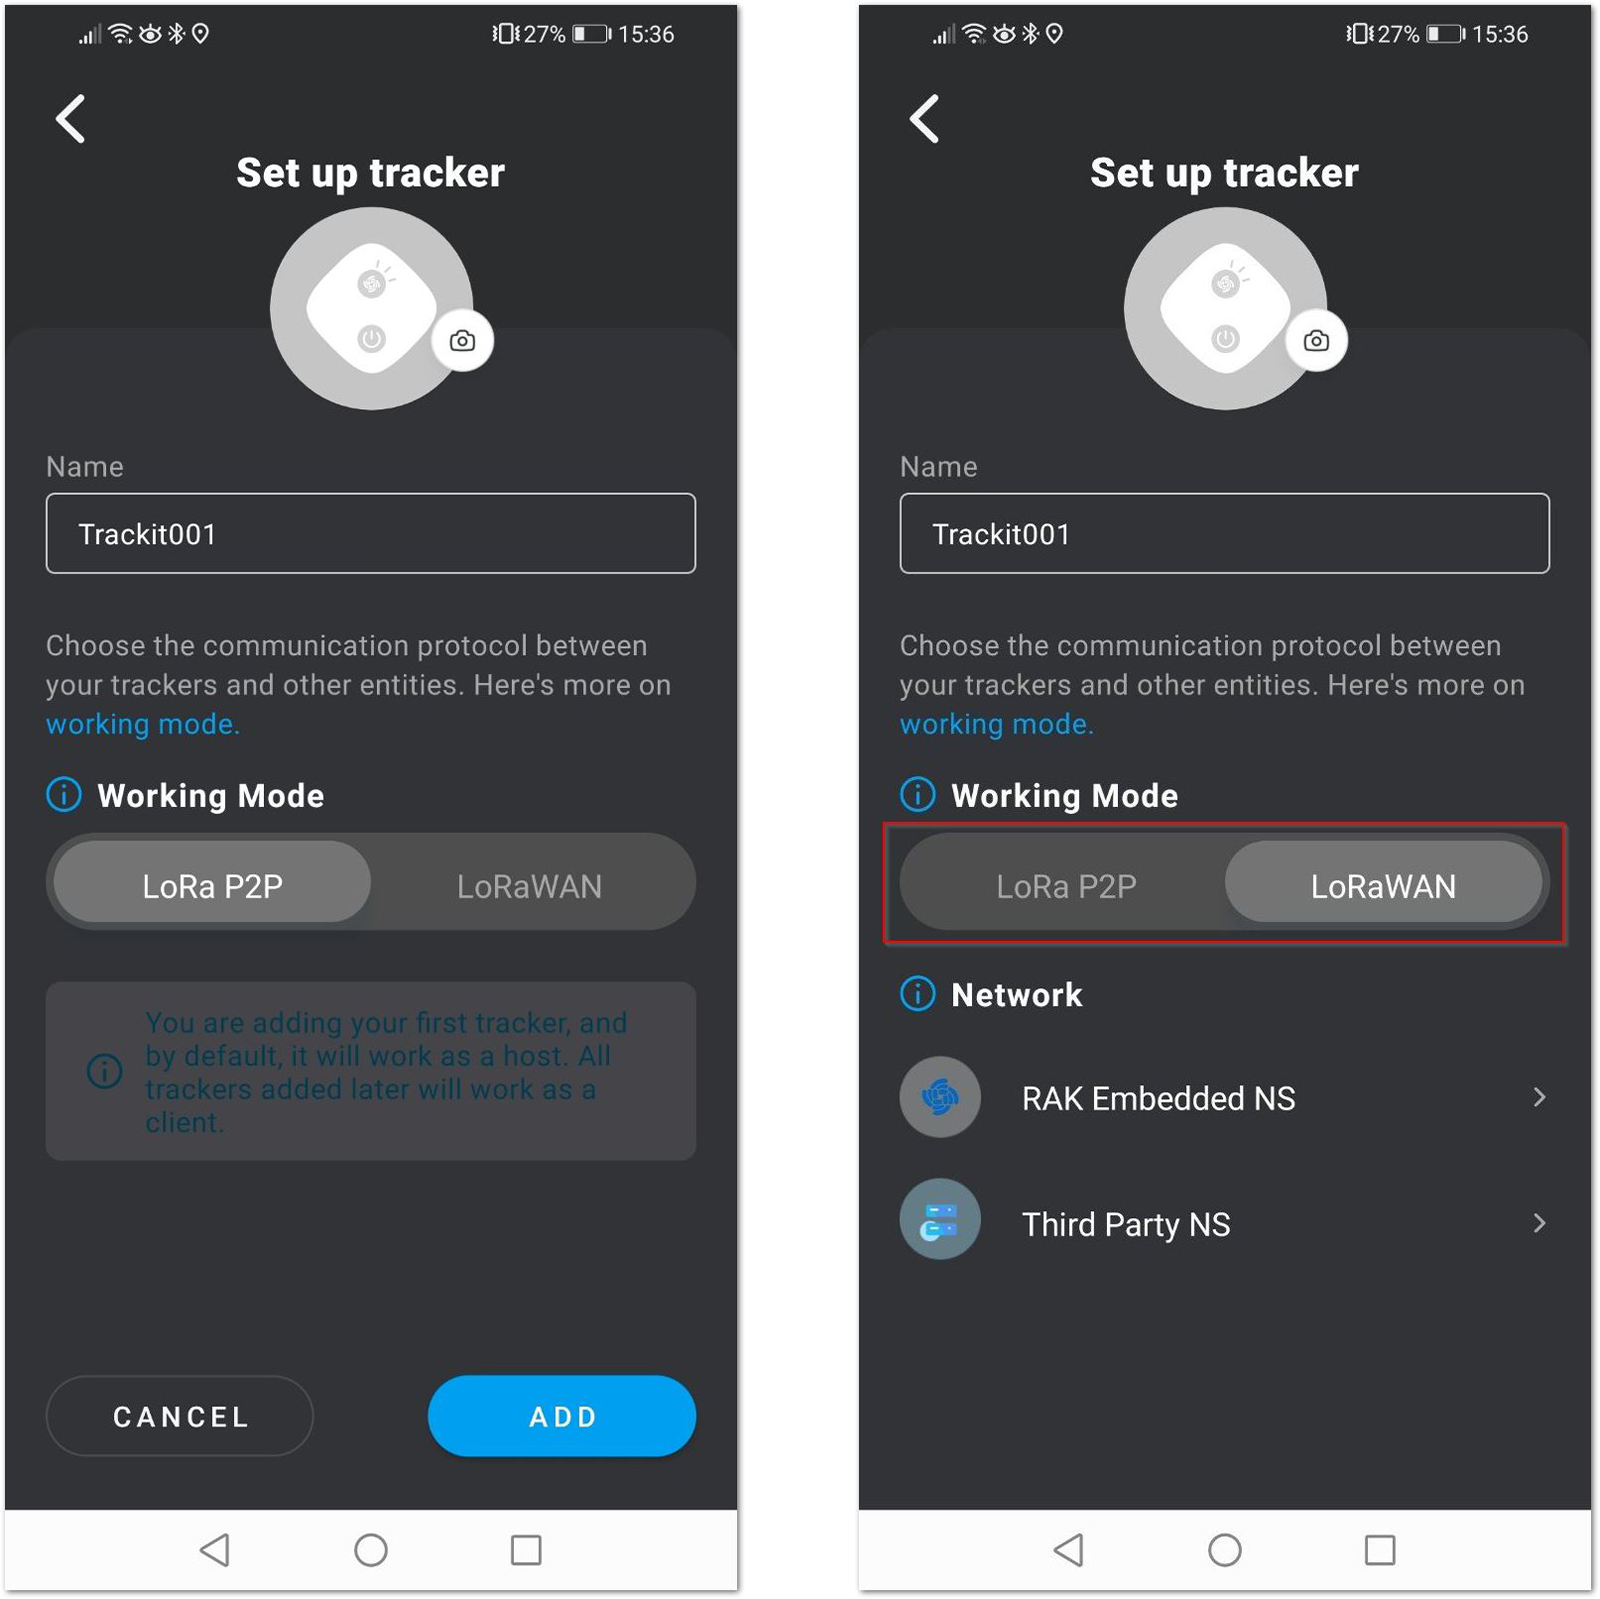
Set up screen
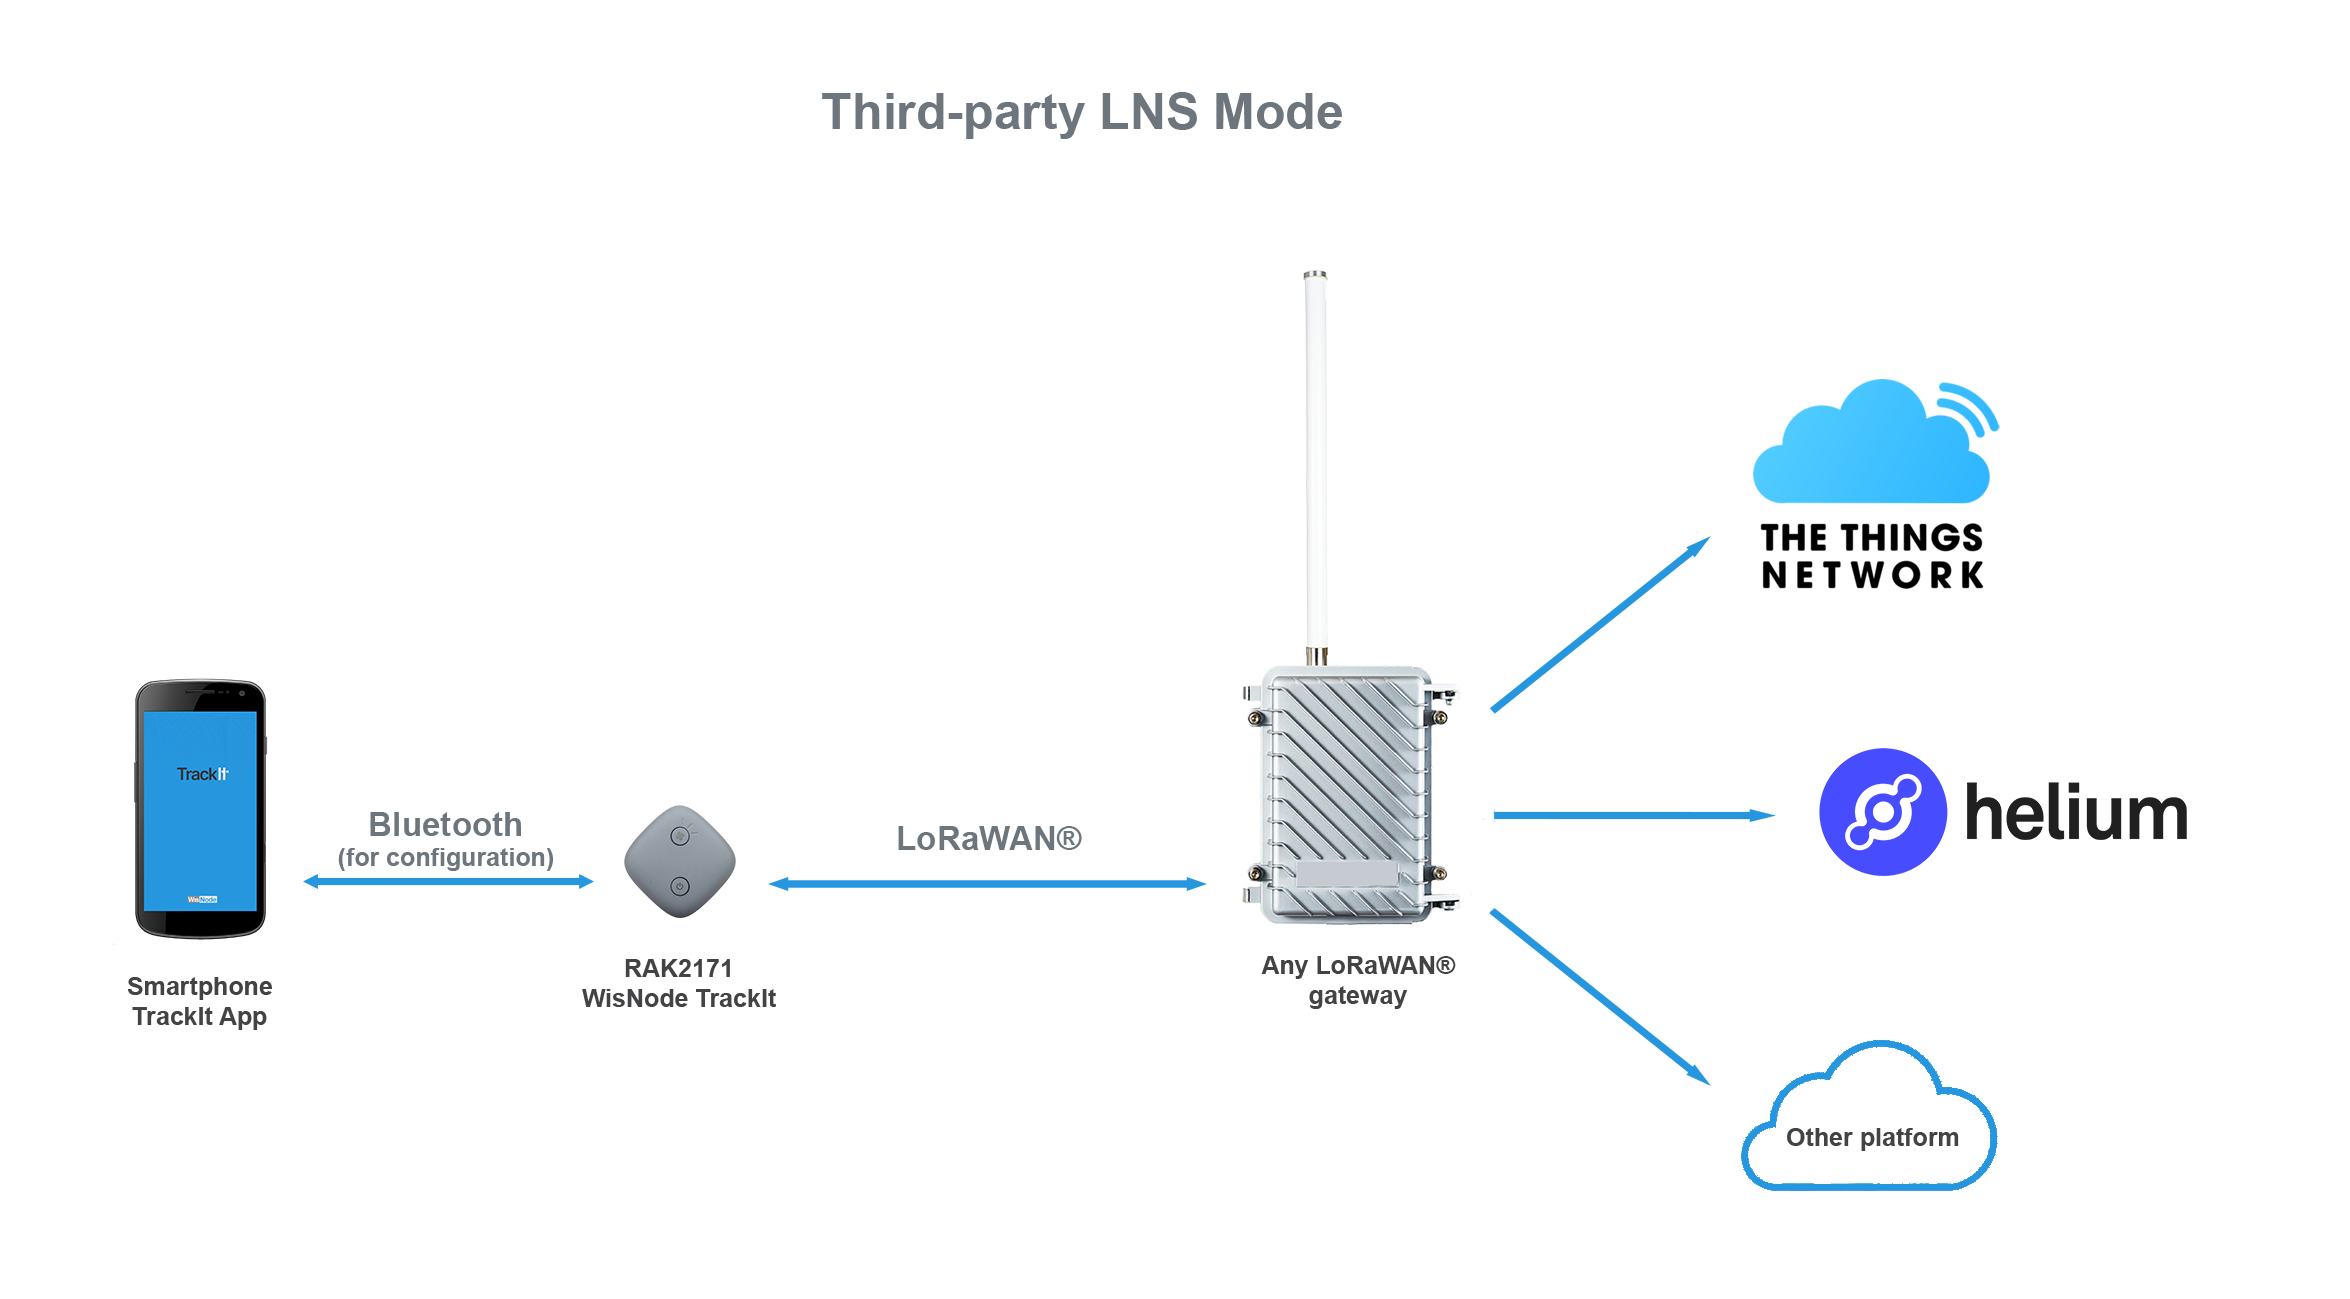
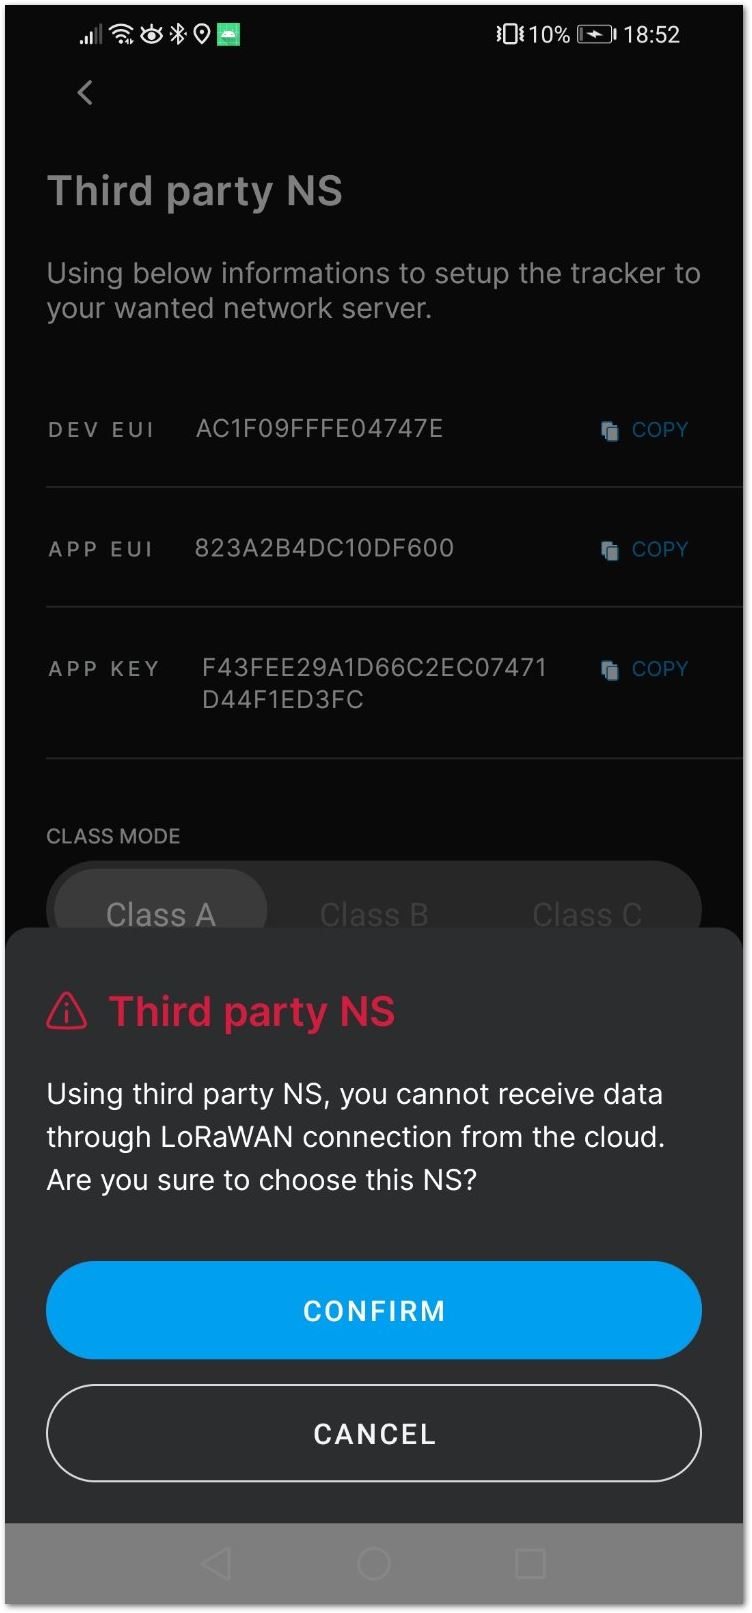
- You will see two options: RAK Embedded NS and Third Party NS. For this mode, press Third Party NS.
- You can see the RAK2171 Device EUI, Application EUI, Application Key, Class, and Join mode. From the Region menu, you can select the LoRaWAN band to be used.
📝 NOTE:
- For now, the Class and Join mode can’t be changed.
- All LoRaWAN bands will be added with next firmware updates.
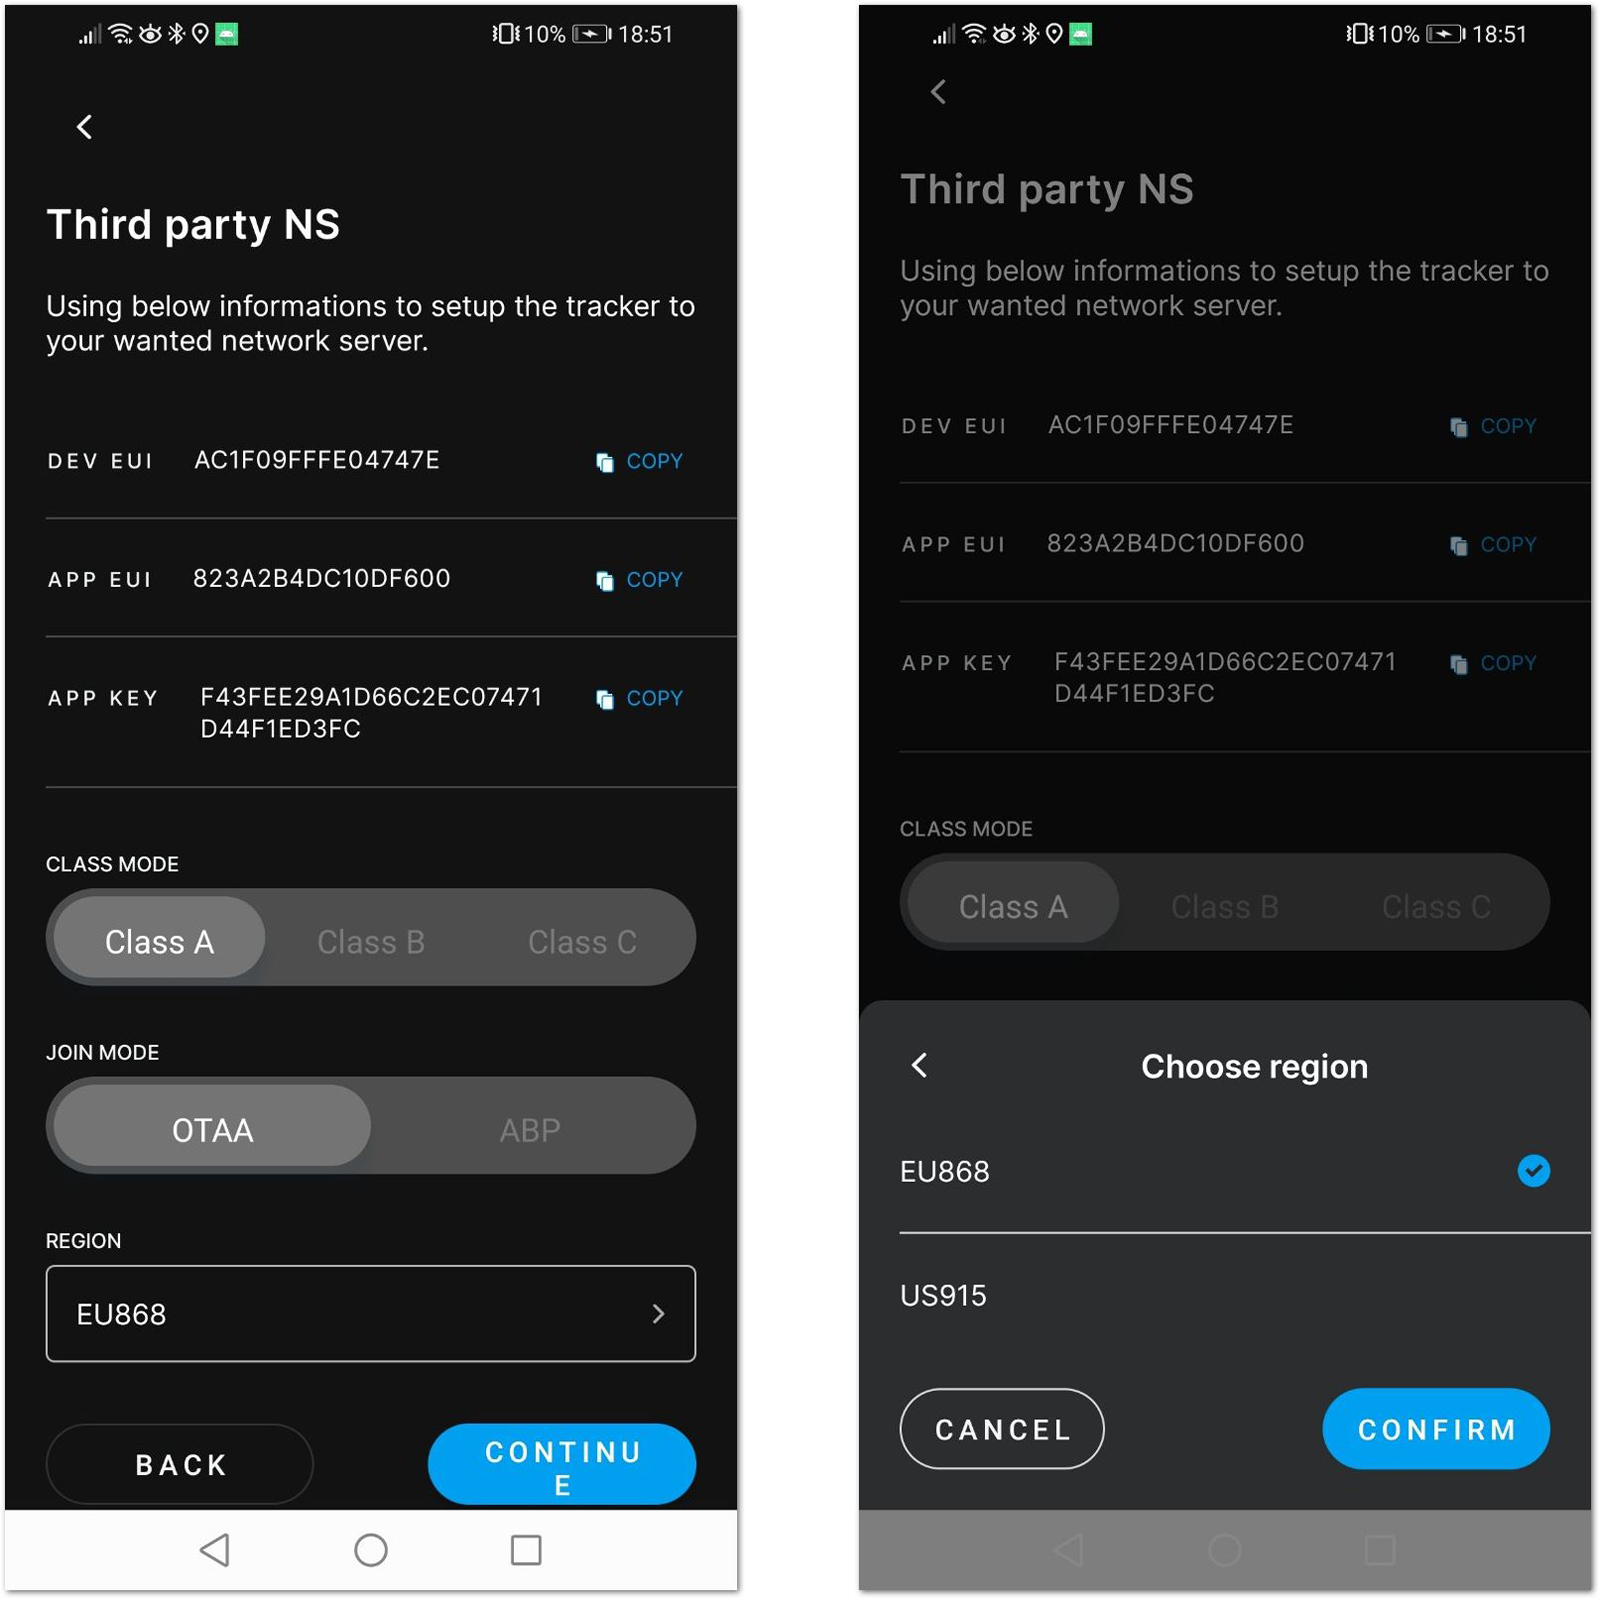
Third Party NS Set up screen
- Press CONFIRM to choose the selected LoRaWAN region. Then, press CONTINUE.
- A notification will be displayed, that in Third-party LNS mode the device’s position data will be not available on the TrackIt App’s map as the data will be sent to the Third-party Network Server directly.
Third Party NS Confirmation